
Remote controlling the intelligent PDU from your computer requires accessing the PDU's web interface or using a specific software provided by the manufacturer. Here are the steps to control the intelligent PDU from your computer using its web interface.
Step 1: Physical Connection
The first step is to establish physical connections between them. The intelligent PDU should be connected to a power source, and connected to the router via an Ethernet cable. The computer can use the Wi-Fi or be connected to the router too. Ensure that all the cables are securely plugged in and that the power is turned on.
Step 2: Ensure that the Intelligent PDU and Computer are on the same network
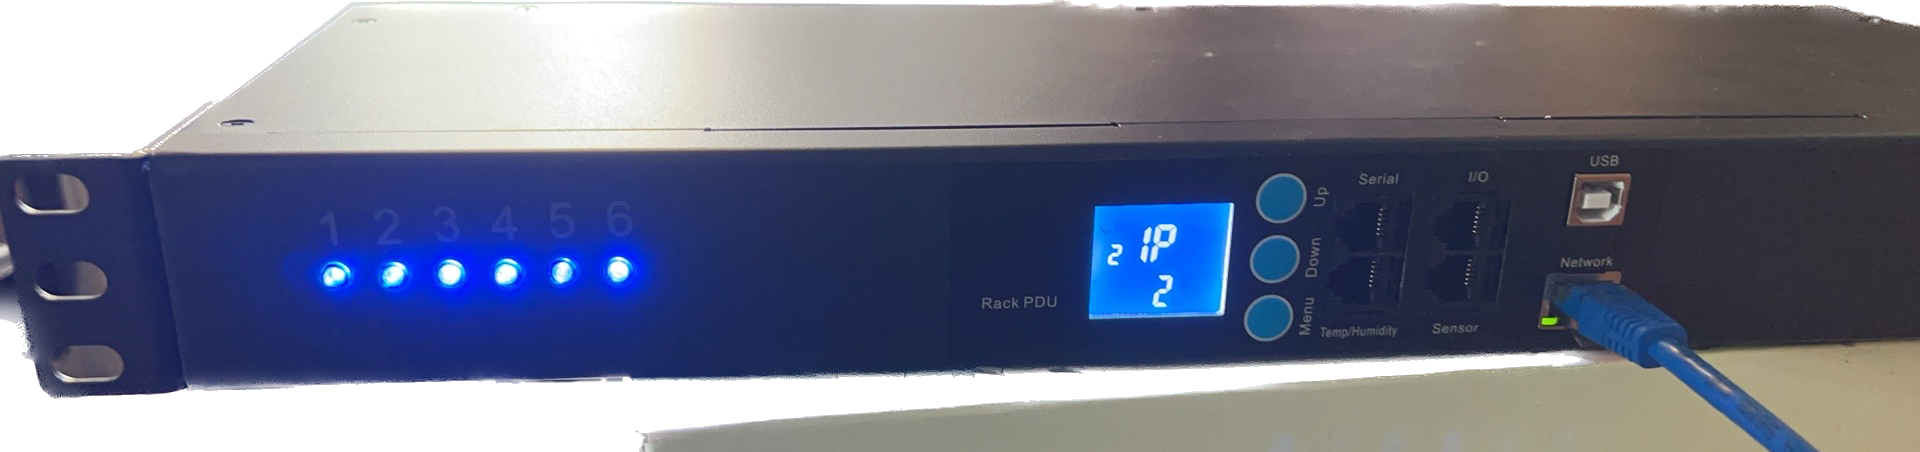
To control the intelligent PDU from your computer, ensure that both devices are connected to the same network. For example, the initial IP for Newsunn intelligent PDU is 192.168.2.55, so the IP addresses of your router and computer have to be both in the same network ID, eg.192.168.2.xx.(xx means any different numbers between 0-255).
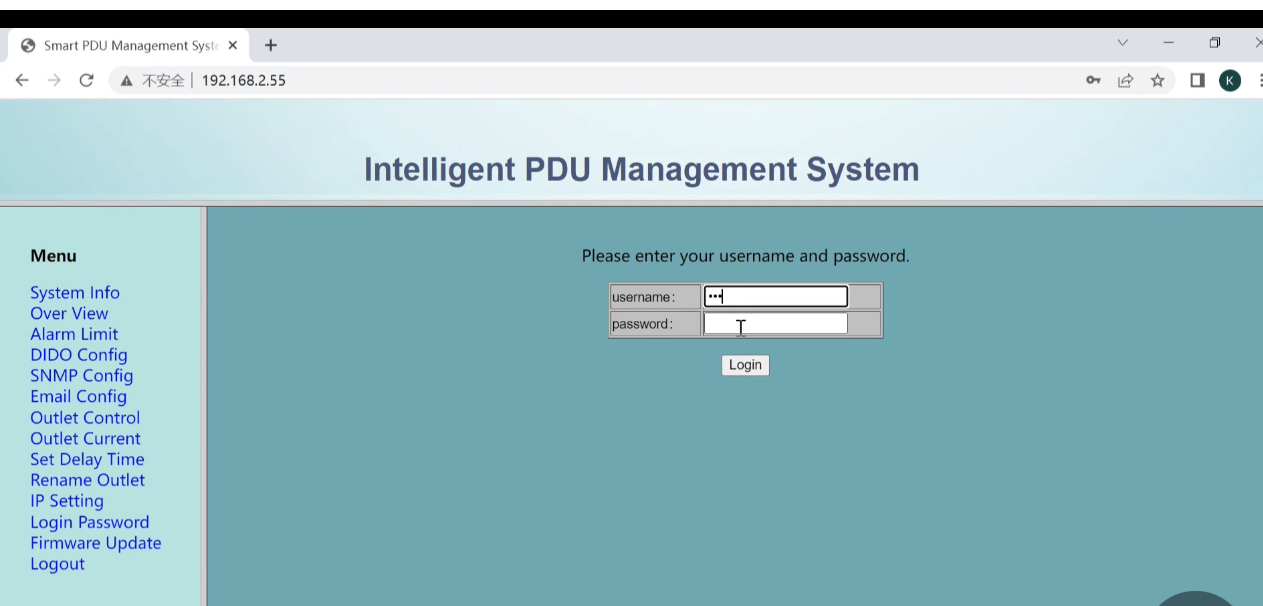
If your iPDU, computer and router happen to be in the same network already, you only need to open a web browser on your computer and type the IP address of the intelligent PDU in the address bar. The IP address should be the same as the one you set up during the initial configuration of the PDU. Press the Enter key to access the PDU's web interface.
If NO, it takes some minutes to set up.
First, Configure the Router
To configure the router, you need to access its web interface. Connect a computer to the same network as the router and open a web browser. Enter the router's IP address in the browser's address bar and press enter. Log in to the web interface using the default username and password or the one provided by the manufacturer. Once you have access to the web interface, you can configure the router's settings. You can change the router's IP address in the same network as PDU, e.g. 192.168.2.xx.
Second, change the IP address of your computer to be on the same network.
Step 1: Open Network and Sharing Center
Click on the Start menu and type "network and sharing center" in the search bar. Open the Network and Sharing Center from the search results.
Step 2: Select Change Adapter Settings
In the Network and Sharing Center, click on "Change adapter settings" in the left-hand menu.
Step 3: Select Ethernet Connection
Select the Ethernet connection that you want to modify. If you are using a wired connection, it will be labeled "Local Area Connection."
Step 4: Open Properties
Right-click on the Ethernet connection and select "Properties" from the dropdown menu.
Step 5: Modify IP Address Settings
In the Properties window, select "Internet Protocol Version 4 (TCP/IPv4)" and click on the "Properties" button.
Step 6: Assign New IP Address
In the Internet Protocol Version 4 (TCP/IPv4) Properties window, select the "Use the following IP address" option. Assign a new IP address to each computer, making sure that they are on the same network. For example, you can assign the IP addresses 192.168.2.2, Click the subnet mask to show automatically, and then key in the Default Gateway the same address as the router.
Step 7: Save Changes
Click on "OK" to save the changes you made to the IP settings.
So far, your IP management PDU and company have been in the same network. You can open a web browser on your computer and type the IP address of the intelligent PDU in the address bar. The IP address should be the same as the one you set up during the initial configuration of the PDU. Press the Enter key to access the PDU's web interface, and control it as your demand.
Is it super easy?
Post time: Feb-23-2023